
TORQ N’ SEAL® Elastomer Condenser Plug Installation Instructions
Click here for printable PDF version
Specifications
- Max Service Temperature: 300°F (150°C)
- Max Operating Pressure: 250 psi (1.7 MPa)
- Plug Material: 6061 Aluminum / EPDM
- Torque Value to Seal: 120 in-lb (7 Nm)
- Inner Diameter Range: 0.580” to 1.200” (14.7 to 30.5 mm)
Tools You Will Need
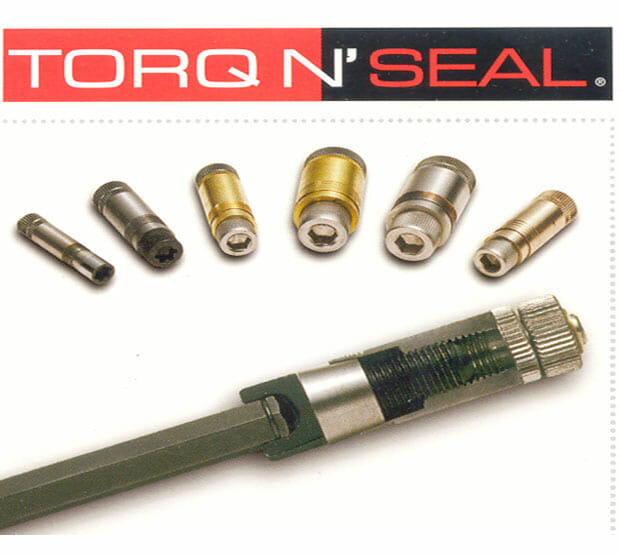
- Torq N’ Seal® Condenser Plugs (supplied by JNT)
- Hex Capture Drive (comes included with all Torq N’ Seal® plug purchases)
- 3/8” Square Drive Torque Wrench (supplied by customer)
Step 0: Order the Correct Torq N’ Seal® Elastomer Condenser Plug
Identify your tube inner diameter (see Appendix 1 at bottom of page for Tube ID chart), then select the plug below with the appropriate range:
- Part Number: Expansion/Tube ID Range
- TNS-ECP-0580: 0.580” – 0.640” (14.7 – 16.3 mm)
- TNS-ECP-0625: 0.625” – 0.710” (15.9 – 18.1 mm)
- TNS-ECP-0750: 0.750” – 0.840” (19.0 – 21.3 mm)
- TNS-ECP-0875: 0.875” – 0.960” (22.0 – 24.4 mm)
- TNS-ECP-1000: 1.000” – 1.100” (25.4 – 27.9 mm)
- TNS-ECP-1125: 1.125” – 1.200” (28.6 – 30.5 mm)
If you are unsure which Torq N’ Seal® plug to choose, please check out our Plug Selector or you can contact one of our engineers at 201-641-2130, email us at SALES@JNTTECHNICAL.COM, or fill out our Contact Form. We pride ourselves on getting back to you right away. After you have identified and procured the correct Torq N’ Seal® plugs, you are ready to seal the leaking tubes. Follow the 3 simple steps below to ensure a permanent, positive seal up to 250 psi!
Step 1: Prepare the Tubes and Plugs
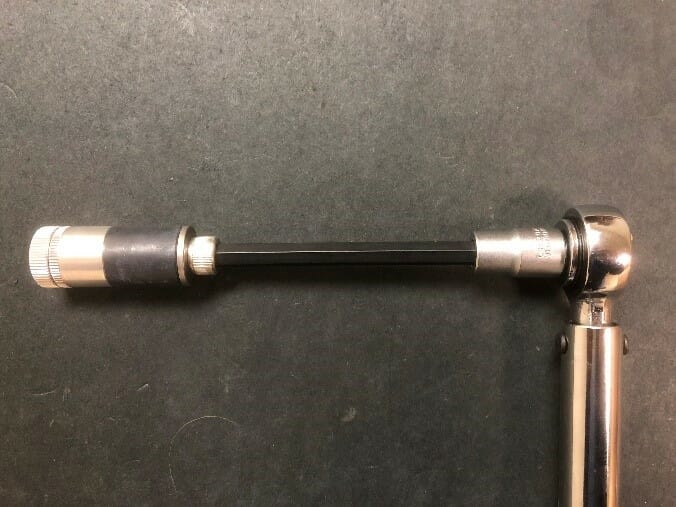
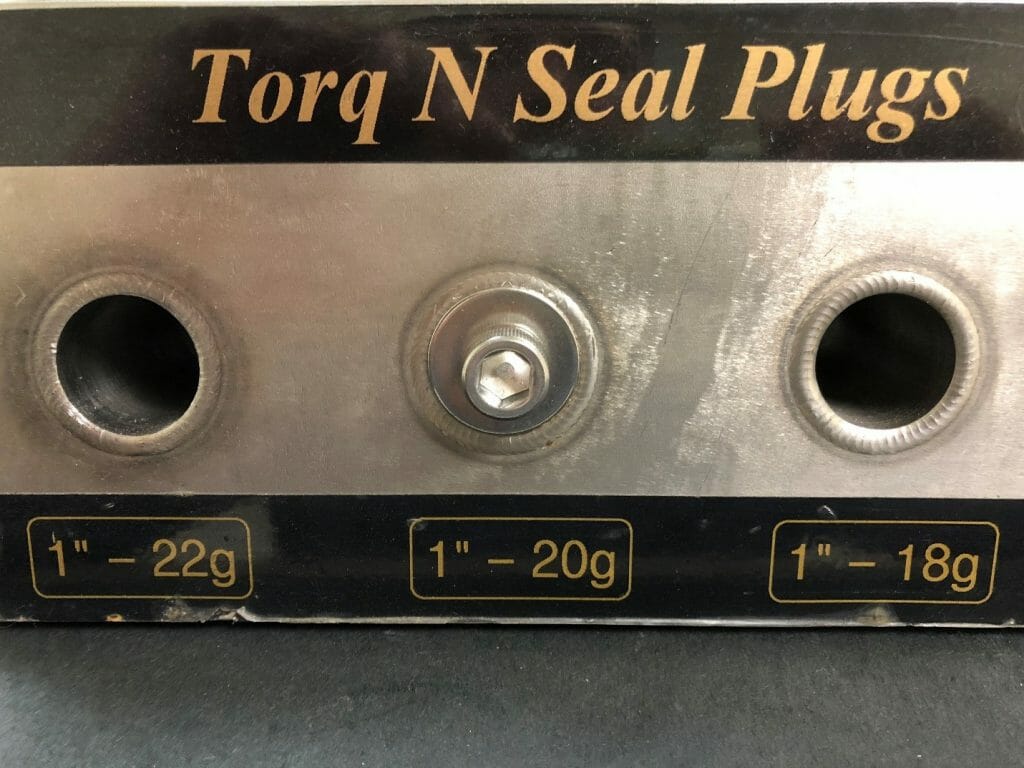
Remove any loose scaling or oxide formation by means of a tube brush. Snap the Elastomer Condenser Plug onto the specialized 5/16” Hex Capture Drive, at least one of these installation tools is provided with every purchase, then attach that to your 3/8” Square Drive Torque Wrench. Set the Torque Wrench to 120 in-lbs.
Step 2: Insert the Plug into the Tube
Align the cam with the plug body and insert the plug into one end of the leaking tube. Insert the plug until the rubber portion is all the way into the tube, this will ensure maximum sealing area on the tube Inner Diameter and a confident seal.
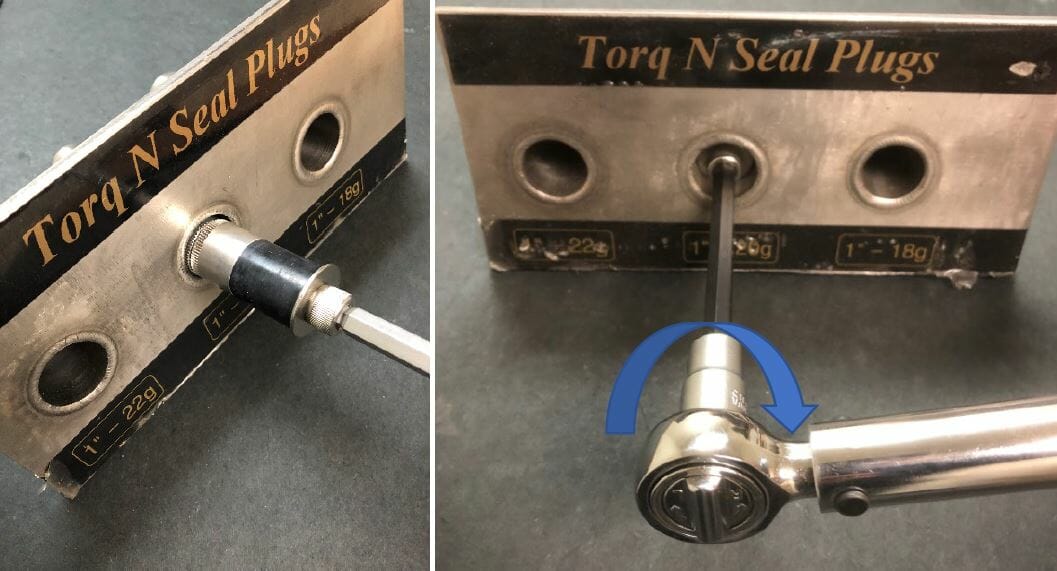
Step 3: Seal the Tube
Begin to rotate the T Handle Hex Capture Drive clockwise. As you rotate, the cam will fall out of center with the plug body and “lock” the plug into place. This provides the necessary anti-rotation force that will allow the screw to compress and expand the EPDM seal, effectively plugging your tube.
Continue rotating clockwise until the Torque Wrench clicks to indicate 120 in-lb has been reached.
Your tubes are now sealed up to 250 psi at up to 300°F.
Step 3a: Removing Plugs
Simply re-insert the Hex Capture Drive and rotate counter-clockwise. This will decompress the EPDM seal and allow the plug to slide easily out of the tube.
Use our Plug Selector to find the right solution for your leaking heat exchangers and place a request for quote.
Click Here for Plug Selector
Torq N’ Seal® Condenser & Low Pressure Instructions
Click one of the links below to see user instructions related to Torq N’ Seal® Heat Exchanger Tube Plugs:
Other Product Options
Click one of the links below to see our other Heat Exchanger Product Offerings:
Use our Plug Selector to find the right solution for your leaking heat exchangers and place a request for quote.
Click Here for Plug Selector